Phew! Relief relief everywhere. I’m finally back to using a smart phone (I tell you, these things have taken over the world) all thanks to A, and for anyone who knows me, I’m super paranoid about new things getting spoilt. So I decided to make myself a mobile phone pouch! This took me all of Saturday simply because I made a million wrong choices and stupid mistakes, which I shall warn you about during the course of this tutorial, so you don’t end up wanting to weep and shred the whole thing.
Things to ABSOLUTELY (yes, I used all caps) keep in mind before making this pouch
. Make sure the colour of the fabric you’re using doesn’t bleed/run.
. Use a sewing machine if you have one and if you’re not very good at stitching by hand.
Now that those two things are established, let’s begin!
Things you’ll need:
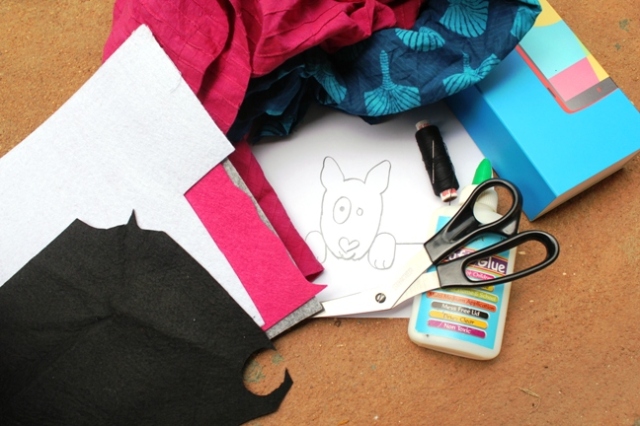
Felt, fabric, a pair of scissors, fabric glue, needle and thread, a picture of what you want on your phone, your phone (for measurement), and ideally, a sewing machine.
First, measure the size of felt you need by using your phone. Leave wide enough margins – I left a bit more than the thickness of the phone on both sides. This is so that the phone is nice an snug, and there’s also room for the stitches.

I made another mistake here – my side measurements were perfect, but I later realized that I should’ve left much more at the bottom. So do that (you can always adjust it and make it shorter later) and cut out two identical pieces of felt.
Next, get your felt cut outs ready using your drawing as a template. You can see that I experimented with different sizes before I settled on the perfect nose and eyes.
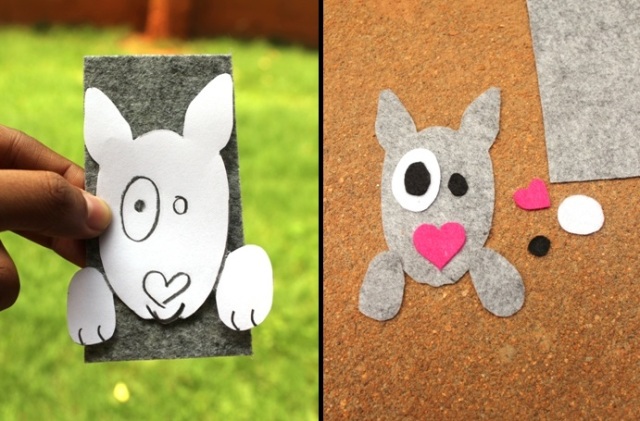
Once you’re happy with your cut out, it’s time to put them all together!
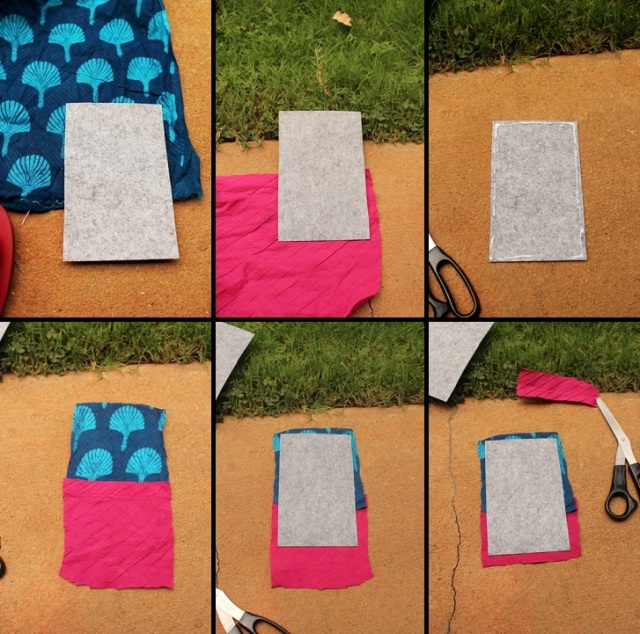
I wanted a two-colour background, because I wanted the dog to look like it’s peeping over a wall. I measured some blue ( a little more than half the length of the felt piece) and pink (a little less than half the length of the felt piece) fabric, and cut them out leaving some extra fabric to fold over. Apply fabric glue on the edges of the felt and stick the two pieces of cloth on it. Turn it over, trim off the excess, line the felt with glue again, and fold the extra fabric over the felt. This side is going to be on the inside of your pouch. Turn it over again, and that’s where you’re going to be sticking your felt cut out.
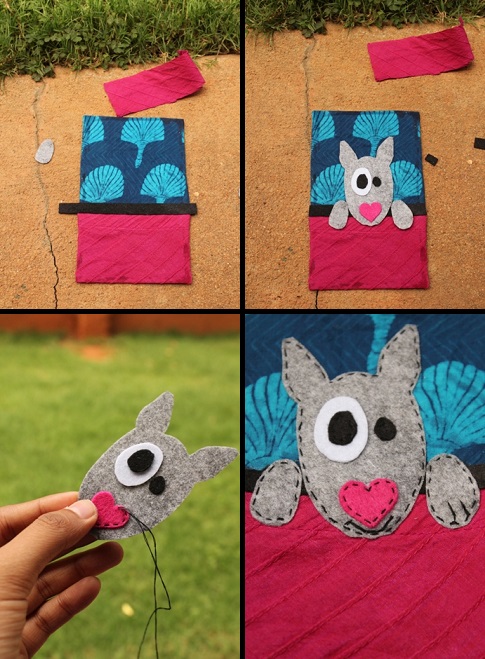
I stuck a strip of black felt over the area where the two fabrics overlapped to cover the messy edges. Place your cut out on the fabric, and when you’re happy with it, go ahead and sew the pieces together. You can opt to simply stick the bits together if you have a strong enough glue, but I’m glad I sewed mine together. I’ll tell you why in a bit! Once the entire piece is ready, sew it onto the fabric. Yes, I know, I forgot to mark the digits on the doggie’s right paw. I put it down to the terrible cold and headache I had on Saturday!

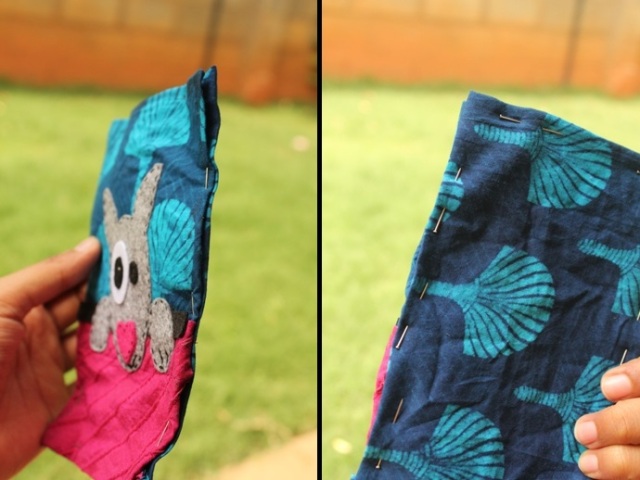
Now comes the slightly tricky part. Tricky for me to explain, that is. I wanted a lining on the inside of my pouch because my felt seemed slightly rough, and remember my paranoia? Yeah. It’s much simpler if you don’t need to line the pouch. Anyhow. Remember that other piece of felt that we haven’t touched yet? That’s going to be the back of your pouch. We’re going to be working with both felt pieces now, so pay close attention! Measure two pieces of fabric (one for each piece of felt), and cut them out again leaving margins on all sides. Place one such fabric piece on your untouched piece of felt, with those extra margins tucked in facing the felt. Phew. Secure these two layers with pins.
Do the same with the other piece of felt. The extra margins of the second piece of fabric should be facing the back of this piece of felt. Secure with pins.
Time to sew! I don’t know why I had the brilliant idea of sewing by hand even though I have a very decent sewing machine. Big big big mistake! Go ahead place the two pieces together – felt facing each other – and sew three sides together. Leave a bit at the top so that you can fold it back and stitch across the top, to make it look much neater. Here was when I realized that I had measured too close to the phone. Can you see in the third picture how the phone is just at the fold? Well, I thought that meant it was fine, and I went ahead and stitched it. But once I turned the pouch inside out, the phone was sticking up quite a bit! So make sure to leave some extra room!
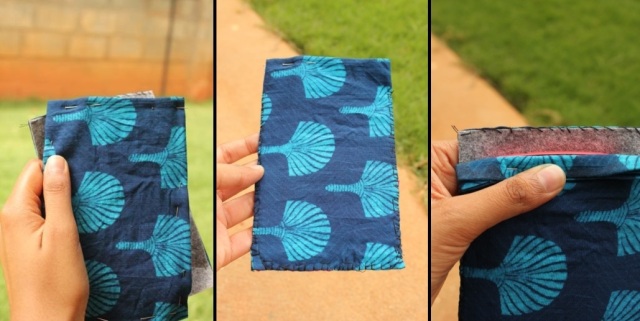
Once that’s done, turn it inside out – or rather right side out. Here’s when I was glad that I had stitched all the doggie bits together – nothing fell apart while I was struggling to turn this thing inside out. This was when I wept at the fact that the phone was sticking out. So I undid the stitches at the top, and replaced it with some very very very untidy work up there. I don’t even know what I was trying. Just to sort of neaten it a bit, to get those two layers to sit together. Anyway, I wasn’t too happy with it, but happy enough with the rest.
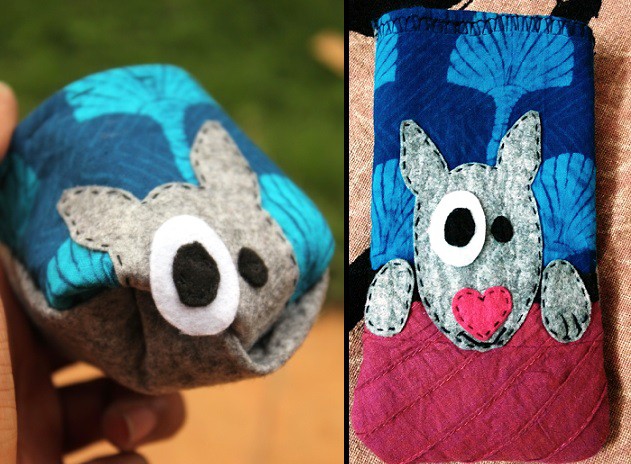
But! Here was the biggest mistake ever. I was super thrilled that I had finally reached the finish line, after having to re-do the entire top portion (and then bits of the sides too, and then I just went and ran a whole set of stitches through everything again, this time with the sewing machine), and then I looked down at my hands, and thought I was dying. No really, I did. They were this very very scary pale blue. And then I realized that the colour from the blue fabric – which I had used to line the entire pouch!- had rubbed off onto my hands. I was mortified just imagining what was going to happen to the neon red back panel of my phone! So I soaked the pouch in salt water overnight, scrubbed it thoroughly on Sunday morning, my tears mixing with the blue water in the basin, and let it dry all of Sunday, finally taking a really bad picture of it on Sunday night.
Phew.
I know.
So I used it today, and the colour isn’t rubbing off anymore! Yay!
All in all, I really loved making this pouch, and can’t wait to make more, with all these lessons learnt! Remember, if you don’t want to DIY, we take orders for all the items featured in our DIY section. But in case you do decide to make a pouch, send us a photo! We’d love to see it!
~Kirtana